Category Archives: photography|landscape

Pleasant View Ridge

Peak 8248, the highest point on Pleasant View Ridge

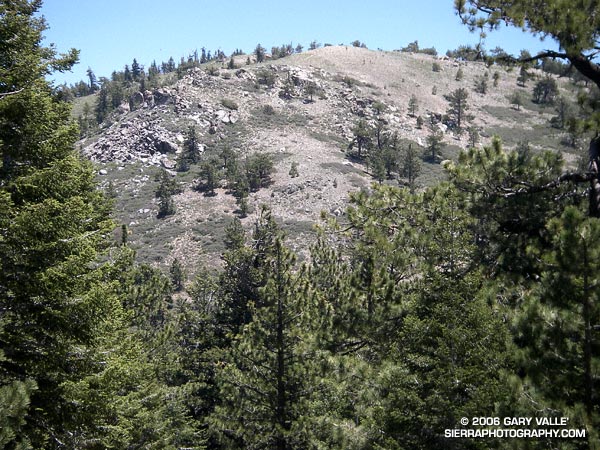
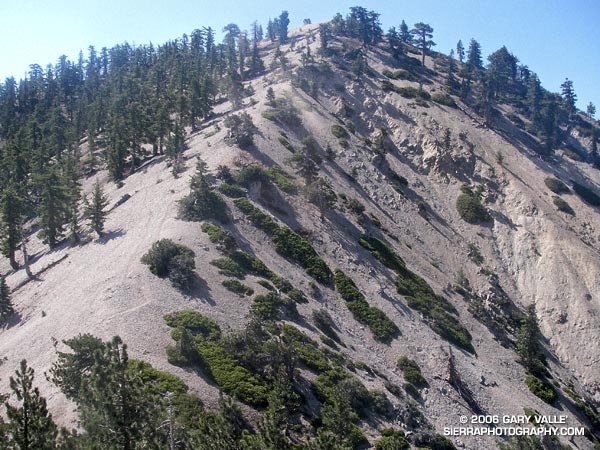
The photograph is of peak 8248, the highest point on Pleasant View Ridge, viewed from the saddle northwest of the peak. Located in the San Gabriel Mountains, Pleasant View Ridge extends northwest about 8 miles from  Mt. Williamson to the vicinity of Indian Bill Canyon.

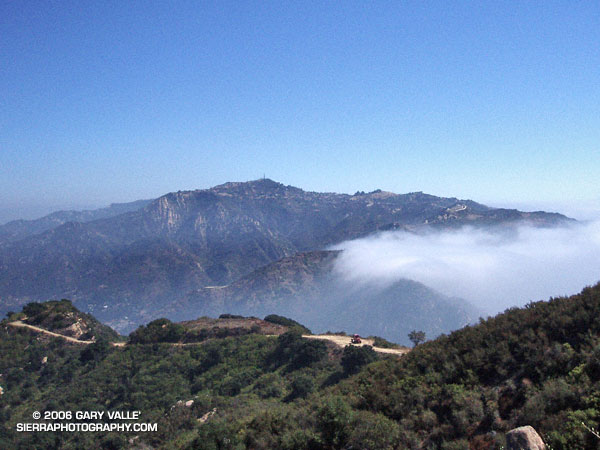
When hikers refer to Pleasant View Ridge, they are usually talking about a 3 mile segment of the ridge that runs from the southeastern summit of Mt. Williamson (8214′) to Burkhart Saddle (6959′). From Mt. Williamson, the ridge follows along a series of 8000’+ summits, then crosses a deep gap to the broad summit of Pallett Mountain (7760’+). From this point, Burkhart Saddle and the Burkhart Trail are another 0.6 of a mile to the west.  There is no maintained trail on the ridge, but over time a use trail has developed and is generally (but not always) distinct. In this photograph of the ridge from the PCT, Pallett Mountain is the peak on the left, in the distance.

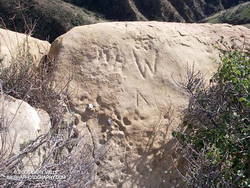
Mt. Williamson is in the peculiar situation that the register for the peak is not on the peak labeled “Mt. Williamson” on the Crystal Lake topo. According to the Sierra Club Hundred Peaks Section Peak List, the register is normally located on peak 8244, which is the next peak along the ridge to the northwest. What is even more peculiar, peak 8248, which is a little further on the ridge, is the highest point of all three!

The section of Pleasant View Ridge between Mt. Williamson and Burkhart Saddle is commonly done as part of a 13 mile loop from Eagles Roost. In order to protect critical habitat of the mountain yellow-legged frog, the Forest Service has closed the PCT between Eagle’s Roost and the Burkhart Trail. In addition, Angeles Crest Highway (SR2) is now closed 0.25 mile west of Eagles Roost. (Update May 27, 2007. Angeles Crest Highway has since been re-opened to Islip Saddle. It was open to Islip Saddle on May 27, 2007, but closed beyond this point. It looked like the road past Islip was being resurfaced.) If the PCT detour suggested by the Forest Service is followed, the loop length is increased to about 14.4 miles, and it is necessary to hike/run a 2.4 mile stretch of Angeles Crest Highway. Done this way, the route has an elevation gain and loss of 4000′ or so.

I usually like to do the loop in the counter-clockwise direction, and that’s what I did on this day. It’s nice to get a big chunk of elevation gain done in the morning while it’s cool, and then have a net elevation loss doing the ridge. Also, except for a few downed trees, the running is outstanding from Burkhart Saddle down to Little Rock Creek. Some Western Columbine (Aquilegia formosa) was blooming along Little Rock Creek.

Here is a Google Earth image and Google Earth KMZ file of a GPS trace of the loop with the PCT detour through Buckhorn Campground. The ridge parallels the San Andreas Fault zone, whose linear features can be seen in the valley below. This Google Earth image shows the approximate position of the fault zone in relation to Pleasant View Ridge loop. It also shows the section of Pleasant View Ridge northwest of Burkhart Saddle.

For more information regarding the PCT detour see the News section of the Angeles National Forest web site.

Updated May 5, 2008. Added elevation profile.

Google search: $g(Pleasant View Ridge), $g(Mt. Williamson), $g(Pallet Mountain), $g(Burkart Trail), $g(trail running), $g(mountain yellow-legged frog), $g(PCT), $g(Pacific Crest Trail), $g(San Gabriel Mountains)

Related post: Peaks Along Pleasant View Ridge

Saddle Peak

Saddle Peak from BackBone Trail on Bulldog Loop.
Saddle Peak from BackBone Trail on Bulldog Loop

Was up early, hoping to beat the heat and do a local run. It looked as though thick high clouds would keep temps down for a while, so several good runs were a possibility. After some debate, I decided on an out and back run to Saddle Peak.

My usual route starts at Piuma Rd. & Malibu Canyon, and follows the Backbone Trail approximately 6.5 miles to a short spur trail which leads to the actual summits of Saddle Peak. Much of the route used to part of the Bulldog 50K, and can be combined with the Bulldog Loop to do a self-supported 27.5 mile run. Here’s a Google Earth image of a GPS trace of both routes.

While both the Bulldog and Saddle Peak routes have great views, are about the same length, and have similar elevation gains, there is one significant difference. Except for a short, 0.3 mile stretch along Piuma Rd., all of the Saddle Peak route is on single track trail.

The trail covers a variety of terrain and habitats. Some sections are lush and shaded, with bay trees, moss-covered rocks and several species of ferns. Other sections are rough and exposed, and can be brutally hot. Not far from where the trail tops out, it passes through a unique area of steeply inclined sandstone slabs.

(Photograph of Saddle Peak is from a Bulldog Loop run on October 2, 2005.)

Vincent Tumamait Trail

Mt. Pinos from the Vincent Tumamait Trail

Mt. Pinos from the Vincent Tumamait Trail

There are several options for runs and hikes in the Mt. Pinos area. On the long side is the 25+ mile run from the lower McGill trailhead to Mt. Abel (Cerro Noroeste) mentioned in Snow Plant Still Life. Another valley-to-summit adventure is the approximately 20 mile out & back run/hike to the summit of Mt. Pinos from Three Falls Boy Scout Camp in Lockwood Valley.

This day I was looking to escape the heat of the San Fernando Valley, but do something a little less ambitious than either of those runs. The North Fork would be too hot, and McGill to Abel too strenuous. Instead, I opted for a third alternative, the Vincent Tumamait Trail between Mt. Pinos and Mt. Abel. By doing a short side trip to the spring at Sheep Camp, I could carry one water bottle and keep things simple.

The route, including the spur to Sheep Camp, works out to be about 14.5 miles, with 3000 ft. or so of elevation gain. There’s a lot of up and down as the trail works its way along the forested ridge, and past the broad summits of Sawmill Mountain and Grouse Mountain.  The trail ends at the Cerro Noroeste road, but it is not difficult to find a way up the steep slope above the road to the summit of Mt. Abel.

In kayaking there is saying that you “never run the same river twice.” The same is true of trails. Each experience on a particular trail is unique. This would be a day of unblemished blue skies and tired legs, the subtle scents of sun-warmed pine needles and Jeffry Pine on the air. A day of bounding deer, Paintbrush reds, and Wallflower yellows. It would be one to contemplate the fallen trees of Cerro Noroeste, the peculiar shape of the Larkspur leaf, the intricacies of the snow plant, and the hummingbird flight of the Bee Fly.

The photograph is a glimpse of Mt. Pinos from the saddle west of the peak. With sufficient snow cover, and the right conditions, I’ve enjoyed good skiing on these slopes, as well as along the ridge leading to Sawmill and Grouse Mountains. Here’s a view of Grouse Mountain from near Mt. Abel.

Here’s a Google Earth image and Google Earth KMZ file of a GPS trace of my route.

PCT Above Windy Gap

Mt. Williamson from the PCT above Windy Gap.

Mt. Williamson from the PCT above Windy Gap

Update May 21, 2009. Angeles Crest Highway (SR2) has since been re-opened to Islip Saddle, and through to Wrightwood.

There’s more of a wilderness feel in the Angeles Forest high country today. A big chunk of Angeles Crest Highway is closed. From Eagles Roost to Mt. Baden-Powell, and back again, the absence of vehicle noise has been startling. There have been no squealing tires, warbling sirens, or red-lined RC51’s echoing up from Highway 2. Instead, the loudest sound is Little Jimmy spring water splashing at my feet. High on a ridge, a Clark’s Nutcracker tells me I’m in the mountains. and overhead, the wind plays quietly in the boughs of an immense Incense Cedar.

It’s been a blazing, triple digit day down in the valleys, and even at 8000 ft. the south-facing slopes have been warm. Chased by the warm weather, several PCTers trek northward; hoping that by the time they get to the Sierra the passes will not be choked with snow. Most have seemed enthusiastic, and eager to face the challenges ahead.

The crux of this day’s adventure looms around the corner at Islip Saddle. The steep 1.5 mile climb to near the summit of Mt. Williamson, and 1.5 mile descent to Hwy. 2 will retrace earlier miles of my trek. A mirror image of this morning’s pleasant ascent, this afternoon’s climb will be a cruel and evil twin. The 1200 ft. elevation gain will bring the day’s total to around 7000 ft.

Descending to the parking lot at Islip Saddle, I automatically look for my car. The lot is empty. Tufts of grass growing in in the pavement cracks waft in the breeze. A couple of PCTers rest in the shade of the restroom. A bird sings a cheerful tune from a nearby tree. I head on up the trail…

Today’s photograph is of a nice downhill section of trail at about 8200 ft, northbound on the PCT, above Windy Gap. That’s Mt. Williamson in the background. I was surprised I didn’t run into anyone that was doing Mt. Williamson. Williamson Rock is in the area closed by the Forest Service to protect critical habitat of the mountain yellow-legged frog, but Mt. Williamson is outside of the closed area (PDF Map). The Hwy 2 closure is about 0.25 mile west of Eagles Roost, and only adds about 2 scenic miles to the round trip up Williamson. If your favorite hikes or runs start at Islip Saddle, here’s a topo map of the area that shows the approximate mileages from the locked gate on Hwy 2 to Islip Saddle. For more information regarding the closure of Williamson Rock, see the  Access Fund Williamson Rock page for more information.

Chumash Rock

Chumash Rock from the Chumash Trail.

Practically any objective can be a good excuse for an adventure. Each time up or down the Chumash Trail, I pondered the prominent rock formation northwest of the trail and wondered what I might find there.

My first thought was to find a direct route across the deep canyon that parallels the Chumash Trail. Recons from a couple of points on the trail revealed this was a bad idea. Sections of the canyon that looked passable from above were incised, with crumbling, near-vertical walls. A Plan B was required.

A look at a topo map suggested it might be possible to access the formation from Las Llajas Canyon. An advantage of this approach was that, if it worked, it could be part of a loop. On a cool January morning, I decided to give it a go.

From Las Llajas Canyon, an old, overgrown roadbed led up a side canyon to a point where there was no obvious route. The canyon bottom did not look promising, and steep slopes bounded both sides of the canyon. After scrambling several hundred feet up a south-facing slope, I found a deer trail that seemed to be headed in the direction I wanted to go.

This game trail was the key. It reflected the cumulative experience of many deer dealing with the terrain issues I faced. It was remarkably efficient and appeared to be the path that expended the least energy to reach the main ridge. That is, if you’re a deer. At one point, I was forced to backtrack when the trail crossed a steep, exposed slope better suited to those with four legs and cervid hooves.

Chumash Rock

Once on the main ridge, it didn’t take long to reach the rock formation.

According to the Dibblee geologic map of the area, the formation is positioned on the south branch of the Simi Fault. The steeply inclined layers of cobble that are embedded in the formation might have been deposited as part of a fan delta some 60 million years ago. This cobble is also encountered at several places along the Chumash Trail.

Near the summit of the formation I found some chiseled inscriptions. They were very weathered. The most prominent might be either a “93” or “33” over the top of a “W,” and another is perhaps a “DH.” It’s hard to tell.

Chiseled inscriptions near the summit of Chumash Rock.

Of the three high points comprising the formation, I scrambled to the top of two. The easternmost summit (on the far right when viewed from the Chumash Trail) involved climbing on loose cobble, and looked like an accident waiting to happen. Here’s a photo from the middle tooth, looking down the ridge.

As I climbed down from the summit to a saddle northeast of the rock formation, I spooked a deer, and it bounded into a brush-filled gully.

Continuing up the ridge, it eventually intersected Rocky Peak Rd. at its high point near some bivalve fossil beds. According to the Dibblee map, these are much younger than the rock formation’s cobble and may have been deposited in shallow marine conditions or lagoons a couple million years ago.

At Rocky Peak Rd. I had the option of returning via Las Llajas Canyon but decided to complete the approximately 8-mile route using the Chumash Trail.

This interactive, 3D terrain map shows the approximate route used to get to Chumash Rock and then complete the loop. The hike/run was on January 29, 2006.

Sage Ranch Sunset


Sunset at Sage Ranch Park, a few weeks following the Topanga Fire.


Sunset at Sage Ranch Park, a few weeks following the Topanga Fire. The loop at Sage Ranch is about 2.4 miles. My usual route here is an out and back of about 4.5 miles. It’s a good short-day run with an elevation gain/loss of about 700 ft. (Photo from a run on November 14, 2005.)